Put Instagram on your Webflow site
Show your latest Instagram photos on your Webflow site with the embed code in an Embed element. Publish once, and new posts appear with no republish.








How do I add an Instagram feed to Webflow?
Add an Embed element from Components inside a container, paste your SnapWidget embed code in the HTML Embed Code Editor, click Save & Close and publish. Webflow shows the widget only on the published site. You need a Webflow site plan for custom code, and free Instagram widgets work on the SnapWidget side.
Step by step: adding a Webflow Embed element
-
1
Create your widget and copy the code
Create your widget in SnapWidget and click Install Widget, then Copy Code. You need a Webflow site plan, because the free plan does not allow custom code.
-
2
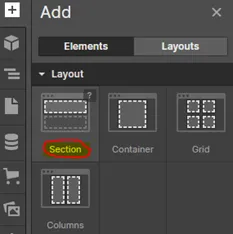
Add a Section and a Container
Open your project and select the page under Pages. Click + (Add Elements) and add a Section, then a Container inside it.
-
3
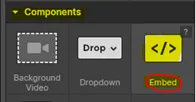
Add an Embed element
Select the Container and choose Embed under Components.
-
4
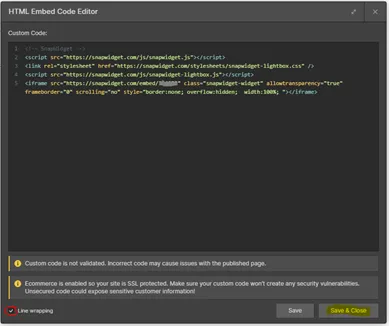
Paste the code and save
Paste the code in the HTML Embed Code Editor and click Save & Close. Webflow does not preview the embed, and shows a message that it only appears on the published site.
-
5
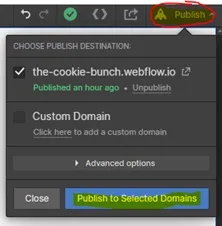
Publish your site
Select Publish on the top menu and click Publish to Selected Domains.
-
6
Check the live page
Open the live site to see the widget. For a smaller, centered widget, wrap the iframe in a div with width: 75%; margin: auto.
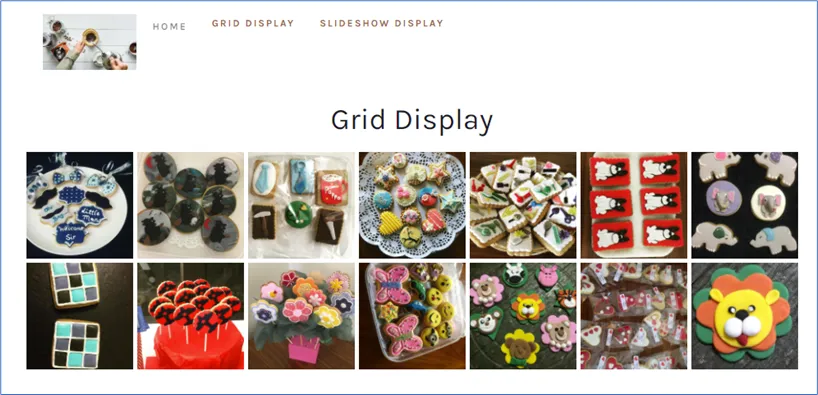
How does the widget fit a Webflow site?
- Paste into an Embed element
- Select a container, add the Embed element from Components, paste the code in the HTML Embed Code Editor and click Save & Close.
- Fits your breakpoints
- Turn on the responsive option, and the widget takes the width of its container on every Webflow breakpoint.
- Place it in any section
- Put the Embed element in any section or container, above or below your other content.
- No republish needed
- Publish your site once. After that, new Instagram posts reach the widget without another publish.
Want every click? Our docs have the step-by-step install guide.
Read the install guideLoved by 200,000+ websites
Don't just take our word for it. See all reviews →
Frequently asked questions
Open your page in the Designer, select a container and add an Embed element from Components in the Add Elements panel. Paste your SnapWidget code, click Save & Close, then publish your site.
Webflow does not preview embed code in the Designer. Publish the site, then open the published page to see the widget.
Our help center notes that the free Webflow plan does not allow custom code, so you need a Webflow site plan for the Embed element. On the SnapWidget side, free Instagram widgets work.
No. Once the page with the Embed element is live, the widget loads your new posts by itself. You only republish when you change the page.
Yes, if you turn on the responsive option when you create the widget. It then takes the width of its container, so it resizes on desktop, tablet and phone.
Keep exploring
-
 Google Sites
Wrap the code in a div, then use Insert, Embed, Embed code.
Learn more
-
 Elementor
Drag in the HTML widget and paste the code. No add-on needed.
Learn more
-
 GoDaddy
Add an HTML section and paste the code in Custom Code.
Learn more
-
 Showit
Add an Embed Code element on the desktop and mobile canvas.
Learn more