Table of contents
Thinking about joining the wonderful world of blogging, but have no idea which platform to use. With so many options available it can be a bit daunting making the choice. SnapWidget has taken a liking to Blogger, and here is why.
With over more than 400 million active users Blogger is one of the most robust platforms out there. It has a wide range of professional themes to keep your site looking “spiffy”.
Have we mentioned it is free? … Blogger sites are hosted on Google servers which mean no money out of your pocket. Whom among us do not like getting something for free …
Getting stuff for free is awesome, but the thing we like most is that it supports a wide range of widgets and plugins and it is so easy to add your Instagram, Facebook or Twitter widget to your blog or site.
In today’s tutorial, we will demonstrate exactly just how easy it is.
If you do not have a widget yet follow the easy steps discussed in our help tutorial: https://help.snapwidget.com/creating-a-new-widget/getting-started/how-do-i-create-a-new-instagram-widget
Once you are satisfied with your widget, follow the appropriate steps below to add it to your blog.
For this tutorial, we will use the Simple theme.
Other themes follow the same principle, some just have more options in regards to placement of the widget on your website, blog or online store.
EG: sidebar-right- 1, Cross-Column or even in footer-1, footer-2-1 or footer-2-2.
1. Editting the Blogger Template
- Select Layout
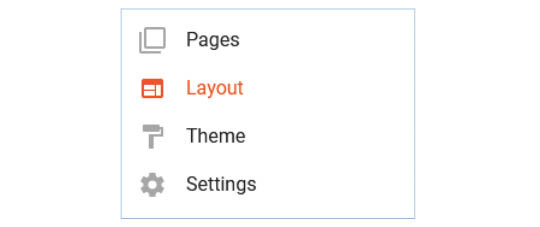
- If you want to place your SnapWidget widget in the sidebar-right-1 area you will find it to be very narrow. You can change the width of the sidebar-right-1 area by going to Blogger Theme Designer and choosing Adjust widths. You should also keep in mind the options of your widget when setting it up on your SnapWidget dashboard (no. of columns and width, etc.).
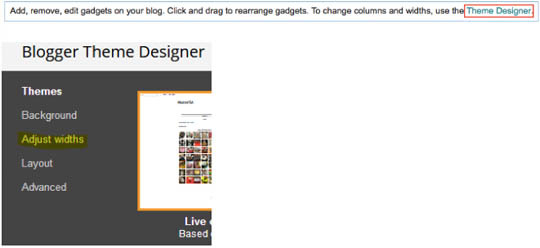
- Set the width to your desired width

- The preview will display the changes in the width in real time.
- Click on Apply to Blog and then go Back to Blogger.

- Select your area and click on Add a Gadget.

- Select the HTML/JavaScript in the pop-up window

- Paste your SnapWidget snippet in the Content box.

- Add a title and click on Save.
- You can also include the widget in the wider Cross-Column area. This will display your widget in the center of the page just under the Header.

- Gadgets can also be dragged between different areas, e.g. move the gadget from sidebar-right-1 to Cross-Column (Note: it cannot be placed in the Header):

- Click on Save arrangement to save your layout. Your widget will now be displayed on your Blogger blog.
2. Changing the appearance of your widget by modifying the snippet content
(Note: Any changes you make to the snippet contents will be only applicable to this Blogger instance, anywhere else you display your widget will be as you have set up your widget on your SnapWidget dashboard.)
- To separate the widget from any other part in the same area insert a
<hr/>tag at the start of the snippet.
Example of an inserted snippet with the <hr> tag, header, widget width set to 75% and the widget encapsulated in a <div> area:

If inserted in the Cross-Column area, your widget will be displayed as follows:

We have also done a video tutorial to demonstrate just how quick and easy it is – https://youtu.be/EGL4a4ZZWhQ
Please feel free to let us know how you get on with the customization of your widget setup and Happy Blogging everyone!