Show your Instagram feed on Kajabi
Add a Custom Code section to any Kajabi page, paste your widget code and choose how many columns it fills. It works in blog posts too.









How to add an Instagram feed to Kajabi
-
1
Create your widget and copy the code
Create your widget in SnapWidget, click Get Widget and copy the code. A responsive widget fills the Kajabi columns you choose.
-
2
Open the page editor
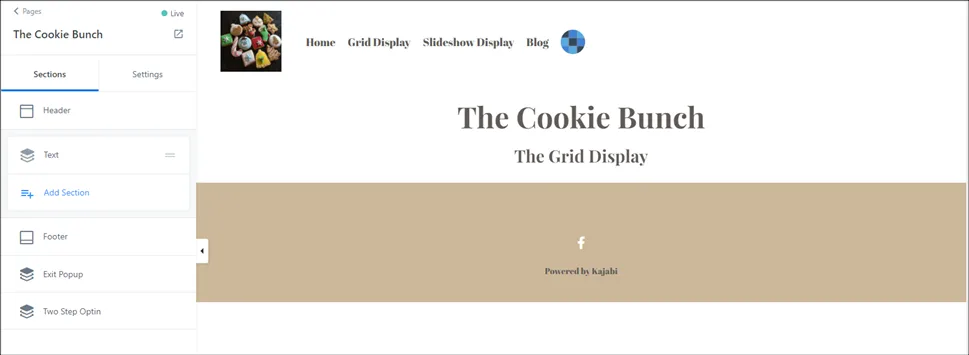
In Kajabi, click Pages and select Customize for the page you want. The editor opens your page.
-
3
Add a Custom Code section
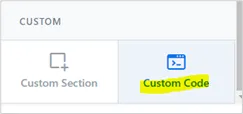
Click + Add Section, scroll to CUSTOM and select Custom Code. Click Add.
-
4
Paste the code and pick the width
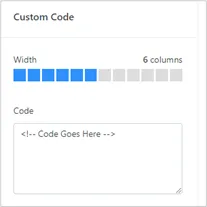
Click Custom Code in the left sidebar and paste the code in the Code box over the existing text. Set Width to the number of columns, up to 12.
-
5
Check the preview
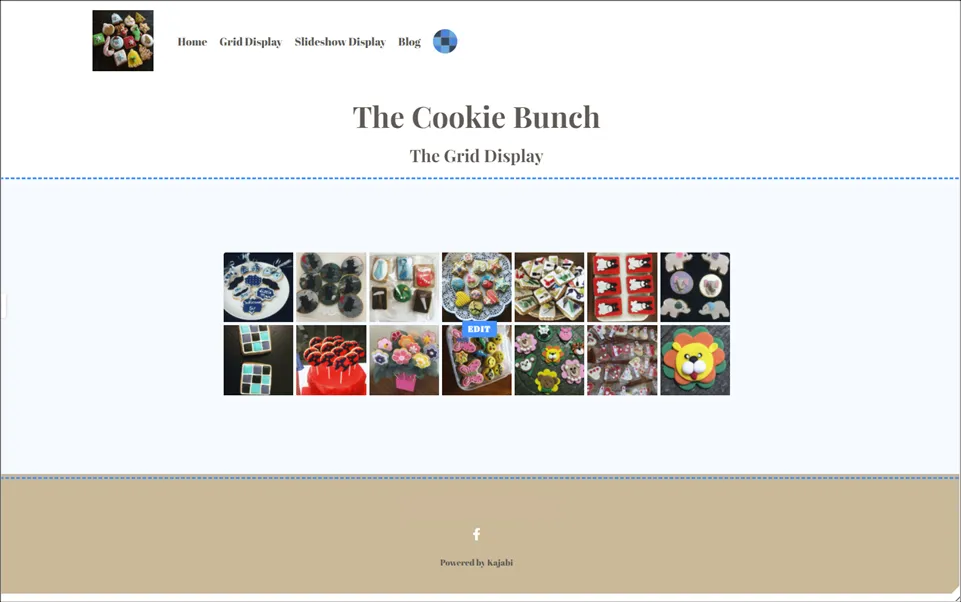
The widget fills the columns you chose. Set more columns for bigger photos, then check the preview.
-
6
Add it to a blog post
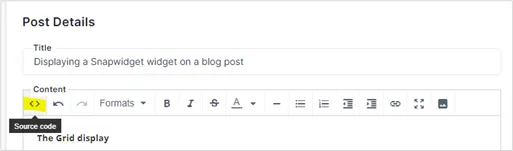
Click Blog in the left sidebar and select the post. Click Source code on the Post Details toolbar and paste the code.
-
7
Fix the lightbox in blog posts
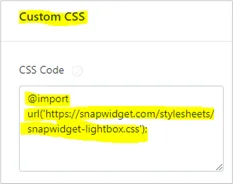
The blog editor strips the stylesheet line, which the lightbox needs. Open Pages, click Customize on the Blog Post page, then Settings and Custom Code. Add @import url('https://snapwidget.com/stylesheets/snapwidget-lightbox.css'); to the CSS Code box and click Save.
Your Instagram on your Kajabi site
- Custom Code section
- In the page editor, click Add Section and pick Custom Code under CUSTOM. Paste the code in the Code box.
- Width in columns
- Set the section to as many as 12 columns. The widget fills the columns you pick, so 8 columns gives bigger photos than 6.
- Blog posts too
- Click Source code on the Post Details toolbar to put the widget in a single blog post.
- A one-time lightbox fix
- The blog editor strips the lightbox stylesheet. One line of Custom CSS on the Blog Post page fixes it for every post.
Want every click? Our help center has the step-by-step install guide with screenshots.
Read the install guideLoved by 200,000+ websites
Don't just take our word for it. See all reviews →
Frequently asked questions
Use a Custom Code section. Click Pages, then Customize on the page, and click Add Section. Choose Custom Code under CUSTOM, click Add and paste your SnapWidget code in the Code box. Set the width in columns.
Leave width:100% in the code and choose the width in columns, up to 12. Our help center says this combination works best. If the widget is too narrow, visitors cannot click the photos.
Yes. Click Blog, select the post and click Source code on the Post Details toolbar, then paste the code. Blog posts have no column setting, so the width comes from the code.
The blog editor removes the stylesheet line that the lightbox needs. Click Customize on the Blog Post page, then Settings and Custom Code, and add @import url('https://snapwidget.com/stylesheets/snapwidget-lightbox.css'); to the CSS Code box. It then works in every post. The lightbox comes with paid plans.
No. The blog editor adds empty CDATA lines, a width and height on the iframe and paragraph tags. Leave them, because they do not affect the widget and Kajabi puts the width and height back if you remove them. Only the missing stylesheet line needs a fix.
Yes. Free Instagram widgets with the grid, slideshow, scrolling, board or popup layout work in a Custom Code section. Paid plans add the lightbox, the feed layout and Shoppable Images, from $8 a month with a 14-day free trial.