Add an Instagram feed to Wix
Wix takes your widget as a web address, not as code. Paste the address into an Embed HTML element, drag it to size and publish.









How to add an Instagram feed to Wix
-
1
Create your widget and copy its address
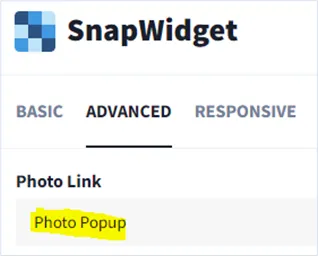
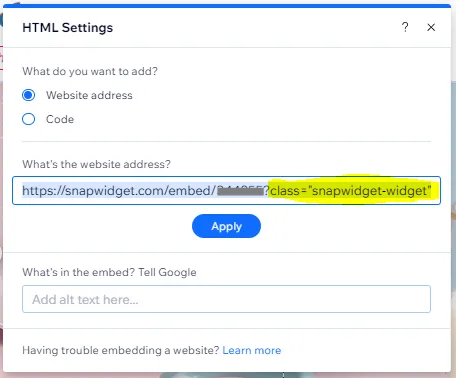
Create your widget in SnapWidget and click Get Widget. Copy the web address from the iframe line of the code (it starts with https://snapwidget.com/embed/) and add ?class="snapwidget-widget" to the end. On paid plans, set Photo Link on the Advanced tab to Photo Popup first.
-
2
Open the page in the Wix editor
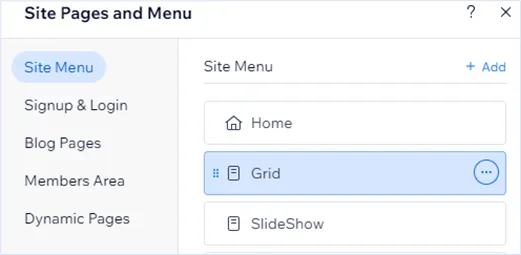
On your Wix dashboard, click Website under Site & App and select Edit Site. Click Pages & Menu, pick the page in the Site Menu or click Add Page, then close the menu.
-
3
Add an Embed HTML element
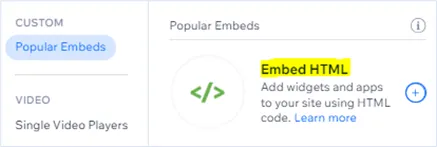
Click + Add Elements, then Embed Code. Under Custom, choose Popular Embeds, then Embed HTML.
-
4
Enter the widget address
In HTML Settings, select Website Address. Paste the address in the What's the website address? box and click Apply.
-
5
Resize the embed area
Drag the handles until no scrollbars show. If the area is too small, the social media icons do not display properly.

-
6
Preview and publish
Click Preview to check the page, then click Publish. The same steps work for a blog post.

What is different about Wix
Wix shows embedded content inside a frame of its own, so the install works a little differently.
- A web address, not code
- In the Embed HTML element, choose Website Address and paste the address from the iframe line of your code. The other lines stay out.
- Photo Popup instead of a lightbox
- A lightbox can only fill the Wix embed area. On paid plans, set Photo Link to Photo Popup, which opens the photo over your page.
- Sized with the Wix handles
- You set the width and height in the Wix editor, not in the code. Drag the handles until no scrollbars show, or use the Editor Toolbar.
- Pages and blog posts
- The steps are the same on a Wix page and a blog post. After you publish, new Instagram posts appear with no edit in Wix.
Want every click? Our help center has the step-by-step install guide with screenshots.
Read the install guideLoved by 200,000+ websites
Don't just take our word for it. See all reviews →
Frequently asked questions
Add an Embed HTML element and give it your widget's web address. Create your widget in SnapWidget, click Get Widget and copy the address from the iframe line. In the Wix editor, click Add Elements, then Embed Code, then Embed HTML. Choose Website Address, paste the address and click Apply.
It is the method our install guide uses for Wix. You take only the address from the iframe line and let the Wix handles set the size, so the other lines of the code stay out. Add ?class="snapwidget-widget" to the end of the address, as the guide shows.
Wix shows the widget inside its own frame, so a lightbox can only be as big as the embed area. Set Photo Link to Photo Popup instead, and the photo opens in a popup over your page. Photo Link options come with paid plans.
Make the embed area bigger. Drag the handles until no scrollbars show. If the area is too small, the social media icons on the photos do not display properly.
Yes. Our help center says the steps are the same for Wix pages and blog posts. Add an Embed HTML element to the post and enter the widget address in the same way.
Yes. Free Instagram widgets use the grid, slideshow, scrolling, board or popup layout, and they work in Wix. On a free widget, a click on a photo opens the post on Instagram. Paid plans start at $8 a month and add the feed layout, Photo Popup and the lightbox.